Building a lithium battery pack is more than connecting cells and adding wires. It involves electrical design, thermal control, mechanical protection, and careful testing. If you want to build your own lithium battery pack, safety must guide every decision, from choosing matched cells to checking the finished enclosure.
Experienced builders begin with a clear load profile. They calculate voltage, capacity, continuous current, and expected temperature. Reliable sources matter. Use cells from traceable suppliers, read the manufacturer’s datasheets, and select a battery management system designed for the exact chemistry and series count. A fuse, insulated connections, secure cell holders, and a strong enclosure can reduce common risks. Never ignore swelling, damaged wraps, unusual heat, or a sharp chemical smell.
Small details matter.
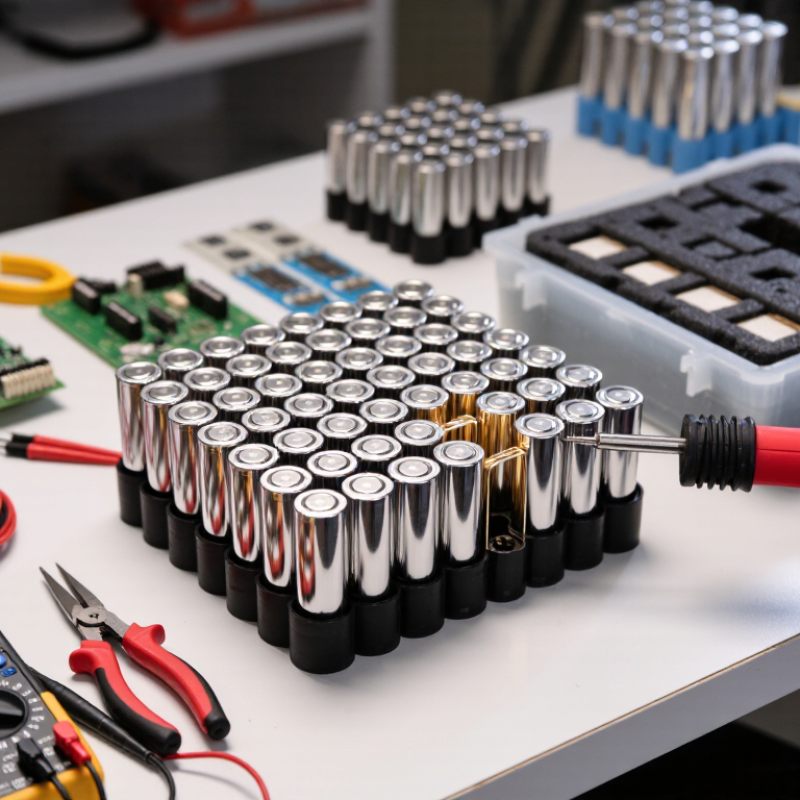
A practical build should include controlled assembly, short protected leads, and insulation that cannot shift during vibration. Spot welding is generally preferred for cylindrical cells, while soldering directly to cells can create dangerous heat. Still, no method is automatically safe. Poor technique can damage cells or weaken connections.
This guide focuses on responsible design rather than shortcuts. It explains how to plan, assemble, test, and store a pack using recognized safety practices. Some recommendations may need adjustment for your application. That is worth admitting. A design suitable for a low-power device may fail badly in a high-current system. When calculations, measurements, or cell condition seem uncertain, consult a qualified battery professional instead of guessing.
A lithium battery pack is not simply cells joined with wires. Each cell must match in chemistry, capacity, age, and internal resistance.
The International Energy Agency reported that electric vehicle battery demand exceeded 750 GWh in 2023.
Scale is growing fast. Safety requirements must grow faster.
Use a properly rated battery management system, individual fuses, temperature sensors, and secure insulation. The enclosure should resist heat and prevent movement during impact. Cell holders matter. Never depend on the BMS alone; it cannot repair damaged cells or poor connections.
FDNY recorded 268 lithium-ion battery fires, 18 deaths, and 150 injuries in 2023. Small assembly mistakes can create serious consequences.
Test every cell before assembly, then verify voltage balance, charging temperature, discharge current, and short-circuit protection. Use a charger designed for the exact chemistry.
IEC 62133-2 addresses portable lithium battery safety, while UN 38.3 covers transport testing, not complete product safety. That distinction matters.
I would not call a first prototype safe after one successful charge. Inspect it repeatedly, document failures, and stop using any swollen, dented, leaking, or unusually hot cell. Keep testing.
How to Build Your Own Lithium Battery Pack Safely?
Selecting compatible cells is the first safety decision. Match the chemistry, nominal voltage, capacity, discharge rating, and physical size. Never combine cells with different ages, capacities, or internal resistance. The 2024 IEA Global EV Outlook reports that lithium-ion battery pack prices fell 14% in 2023, but lower costs do not remove electrical hazards. Inspect every cell for dents, corrosion, swelling, or damaged insulation. Reject questionable cells. Do not improvise.
A suitable battery management system must match the cell chemistry, series count, balancing method, and maximum current. Add a correctly rated fuse near the pack’s positive terminal. Use nickel-based interconnects designed for the expected current, secure insulation, and a nonconductive enclosure with strain relief. The charger must match the final voltage and chemistry exactly. A mismatched charger can cause overheating, gas release, or fire. The National Fire Protection Association identifies lithium-ion battery failures as a growing fire-safety concern in its lithium-ion battery safety research.
Work on a clear, dry bench away from metal objects and flammable materials. Wear safety glasses, flame-resistant clothing, and suitable electrical gloves when testing energized parts. Insulated tools reduce accidental shorts, but they cannot replace careful procedures. Measure each cell before assembly, then verify polarity, total voltage, and BMS operation. I would repeat these checks after vibration testing, because loose connections may look safe at first. Keep a smoke alarm nearby, and stop immediately if a cell becomes hot, swollen, or emits an unusual odor. Never charge an untested pack unattended.
| Category | Selection Dimension | Typical or Required Specification | Compatibility and Safety Guidance |
|---|---|---|---|
| Cell Chemistry and Electrical Compatibility | |||
| Cell chemistry | Lithium-ion NMC/NCA | Nominal voltage: approximately 3.6–3.7 V per cell Full-charge voltage: 4.20 V per cell |
Use only a charger and BMS designed for this chemistry. Do not substitute a lithium iron phosphate charger or BMS. |
| Cell chemistry | Lithium iron phosphate (LFP) | Nominal voltage: approximately 3.2 V per cell Full-charge voltage: approximately 3.65 V per cell |
Requires an LFP-compatible charger and BMS. The lower cell voltage is not interchangeable with standard 4.20 V lithium-ion cells. |
| Cell chemistry | Lithium titanate (LTO) | Nominal voltage: approximately 2.3 V per cell Full-charge voltage: approximately 2.7 V per cell |
Requires dedicated LTO charging limits and protection settings. Do not combine with NMC, NCA, or LFP cells. |
| Cell matching | Model, chemistry, capacity, age, and condition | Use cells of the same type and closely matched measured capacity and internal resistance | Never mix different chemistries, cell formats, unknown cells, visibly damaged cells, or cells with significantly different histories. |
| Cell arrangement | Series count | Pack nominal voltage = cell nominal voltage × number of cells in series | The BMS, charger, insulation, connectors, and load must all support the pack's maximum voltage, not only its nominal voltage. |
| Cell arrangement | Parallel count | Pack capacity = cell capacity × number of cells in parallel | Parallel groups should use matched cells and have secure, low-resistance interconnections. Each parallel group must remain balanced. |
| Cell operating temperature | Charging temperature | Typical lithium-ion guidance: charge only above 0 °C and within the cell maker's specified upper limit, commonly around 45 °C | Do not charge frozen, overheated, swollen, leaking, punctured, or otherwise damaged cells. |
| Cell operating temperature | Discharging temperature | Often approximately −20 °C to 60 °C, depending on chemistry and cell design | Use the narrower limits stated for the exact cell. Cold discharge can reduce performance and increase voltage sag. |
| Protection and Control Components | |||
| Battery management system | Cell-count compatibility | Must match the exact series count and chemistry-specific voltage limits | For example, a 4-series NMC BMS is not suitable for a 4-series LFP pack because their full-charge voltages differ. |
| Battery management system | Protection functions | Overcharge, over-discharge, over-current, short-circuit, and temperature protection; balancing is strongly recommended | Verify the BMS sensing wires, temperature sensors, charge port, discharge port, and current direction before energizing the pack. |
| Battery management system | Continuous current rating | At least the maximum continuous load current, with a practical safety margin | The rating must also account for enclosure temperature, cooling, connector limits, and the cell's continuous discharge rating. |
| Cell current capability | Continuous discharge current | Pack current capability is approximately the cell continuous current × number of parallel cells | Use the manufacturer's continuous rating, not only a short-duration or pulse rating. Avoid operating cells continuously at their absolute limit. |
| Fuse | Placement and rating | Install a correctly rated fuse as close as practical to the battery positive terminal | The fuse should protect the wiring and connectors against short circuits while tolerating the expected normal operating current. |
| Thermal monitoring | Temperature sensors | Use sensors attached to representative cell groups and connected to the BMS | Protection should stop charging or discharging when temperatures exceed the limits specified for the cells. |
| Charger | Output voltage and charge profile | Must match the chemistry and series count; use constant-current/constant-voltage charging where specified | Never use a generic power supply unless it is specifically configured with the correct voltage, current limit, and charge termination behavior. |
| Wiring | Current and insulation rating | Choose conductor size, insulation, terminals, and connectors for the maximum continuous and fault current | Keep high-current paths short, protect cables from abrasion, and prevent conductors from contacting sharp edges or the enclosure. |
| Busbars and links | Material and construction | Use secure, insulated, low-resistance interconnects suitable for the expected current | Prevent busbars from touching adjacent terminals or the enclosure. Do not rely on loose or improvised metal strips. |
| Insulation | Cell and terminal isolation | Use insulating barriers, fish-paper or equivalent electrical insulation, terminal covers, and abrasion protection | Every exposed positive terminal and conductive connection should be protected against accidental short circuits. |
| Enclosure | Mechanical protection | Rigid, nonconductive or properly insulated enclosure with strain relief and ventilation appropriate to the design | Prevent cell movement, crushing, vibration damage, moisture ingress, and contact with conductive objects. |
| Assembly and Verification Checks | |||
| Before assembly | Cell inspection | Check for dents, swelling, corrosion, torn insulation, leakage, damaged terminals, and abnormal voltage | Quarantine and do not use any cell with physical damage, leakage, swelling, overheating, or an unexplained voltage difference. |
| Before connection | Voltage verification | Measure each cell or parallel group with a calibrated multimeter | Confirm polarity and record readings. A reversed cell can cause an immediate hazardous fault when connected. |
| Assembly method | Terminal connection | Use a cell-appropriate joining method performed by a competent person | Do not solder directly to cylindrical cell terminals unless the cell manufacturer explicitly permits it; excess heat can damage internal safety components. |
| Initial test | Low-risk functional check | Test insulation, polarity, BMS operation, temperature sensing, and cutoff behavior before applying the intended load | Use current-limited test equipment where possible and stop immediately if there is heat, odor, smoke, swelling, or unexpected current. |
| Routine use | Inspection and storage | Store in a cool, dry location away from flammable materials; inspect periodically for damage or swelling | Use the state-of-charge level recommended for the cell or equipment when storing for an extended period, and avoid unattended charging. |
| Personal Protective Equipment and Work Controls | |||
| Eye protection | Safety glasses with side protection | Required during cell testing, wiring, soldering, crimping, and fault investigation | Use a face shield in addition to safety glasses when there is a higher risk of sparks, molten metal, or battery rupture. |
| Hand protection | Electrical-insulating gloves suitable for the measured pack voltage | Use voltage-rated gloves when working on an energized pack; use heat-resistant gloves for hot components | Gloves must be inspected and used according to their rating. Gloves do not replace isolation and current-limiting controls. |
| Clothing | Non-melting, close-fitting work clothing | Wear long sleeves and closed footwear; avoid loose clothing and synthetic fabrics that can melt under heat | Remove rings, watches, bracelets, necklaces, and other conductive jewelry before handling cells. |
| Tools | Insulated tools and covered probes | Use tools rated for the working voltage and protect unused metal portions from accidental contact | Never place uninsulated tools, screws, keys, or other conductive objects on top of cells. |
| Work area | Nonconductive, uncluttered, well-ventilated bench | Keep combustible materials away and provide a suitable container for isolating suspect cells | Do not work alone when handling a high-energy pack. Maintain clear access to an exit and follow local emergency procedures. |
| Emergency response | Smoke, hissing, rapid heating, swelling, or fire | Stop work, disconnect power only if it can be done safely, evacuate the area, and contact emergency services | Do not handle a damaged or smoking pack. Do not re-use cells involved in overheating, fire, impact, or water immersion without professional assessment. |
How to Build Your Own Lithium Battery Pack Safely?
A safe battery pack begins with a clear electrical design. Use cells with matching chemistry, capacity, and condition. Never combine unknown cells. Measure each cell’s voltage and inspect its casing before assembly. A battery management system should monitor voltage, temperature, and current. Add a correctly rated fuse close to the positive terminal. It can limit damage during a short circuit. Keep nickel strips, wires, and terminals away from sharp edges. Small details matter.
Mechanical safety is equally important. Place the cells in a rigid, nonconductive enclosure. Use separate holders or spacers to prevent movement and accidental contact. The pack should not rattle when gently shaken. Secure cables with strain relief, especially near the terminals. Leave room for heat to escape. Do not compress cylindrical cells excessively. Pressure can damage internal layers, even when the outside looks normal. A thin insulating sheet is not enough if screws can pierce it.
Test the design gradually. Check continuity before connecting cells. Then test the protection circuit with a controlled power source and suitable instruments. Monitor temperature during charging and discharging. Stop immediately if the enclosure becomes unusually warm, swells, or smells sharp. I would also inspect every connection twice; a neat pack can still hide one loose joint. My own design reviews often reveal overlooked risks around corners and cable bends. That is uncomfortable, but useful. Safety is never finished at the wiring stage.
Building a lithium battery pack safely begins with controlled assembly, not speed. The International Energy Agency reported global battery demand above 750 GWh in 2023. More packs mean more responsibility.
Work on a clean, dry, nonflammable surface. Match cells by chemistry, capacity, and voltage. Do not mix old and new cells. Check every cell for dents, swelling, corrosion, or damaged insulation.
Place cells in a rigid holder before connecting them. A battery management system must match the pack’s series count and chemistry.
Use nickel strips and a suitable spot-welding process; direct soldering can transfer dangerous heat into cells.
Keep wires short, supported, and protected from sharp edges. Add a fuse close to the positive terminal. It is a small part. It can limit a serious fault.
Insulation needs several layers, not one wrap. Cover exposed terminals with fish-paper rings, then add insulating sheets between cell groups. Secure the pack with a nonconductive enclosure that prevents movement. Leave no loose metal tools nearby.
The U.S. Consumer Product Safety Commission has linked hundreds of injuries to micromobility battery fires in recent years, showing how quickly failures can escalate.
Before charging, measure each parallel group and inspect every connection. The IEC 62133-2 safety standard emphasizes protection against short circuits, overheating, and abnormal charging.
I would still recheck everything. My first layout looked neat, but one cable had unnecessary tension. Neat is not always safe. Never charge an untested pack unattended.
After assembling a lithium battery pack, test it before trusting it. A qualified technician should verify cell balance, insulation, polarity, and connector security. Use a calibrated multimeter and a suitable load tester. Check the pack voltage against its design limits. Test it in a clear, nonflammable area.
Charge the pack with a charger designed for its chemistry and voltage. Stay nearby during the first charging cycles. Watch for unusual heat, swelling, odor, noise, or rapid voltage changes. Stop immediately if any warning appears. Do not charge a damaged pack. The battery management system should control overcharge, over-discharge, and temperature protection, but it is not a substitute for inspection.
Store the finished pack partly charged, usually around 30–60 percent, in a cool, dry place. Keep it away from sunlight, moisture, metal tools, and flammable materials. Cover exposed terminals to prevent accidental contact. Every few months, inspect the casing, wiring, and resting voltage. A pack that slowly loses voltage may have a weak cell. Do not ignore it. In practice, even careful builders can miss a loose connection, so repeat testing after vibration, transport, or heavy use. That extra check may feel inconvenient. It is often the safest step.